
How to Sync Shopify Data to Panoply
Syncing your Shopify data to Panoply is easy. In just 4 simple steps and a couple of minutes, you can set up a Panoply account and start syncing your Shopify data. All you need to get started is your Shopify login and domain name. Take a look:
4 Easy Steps
Step 1.
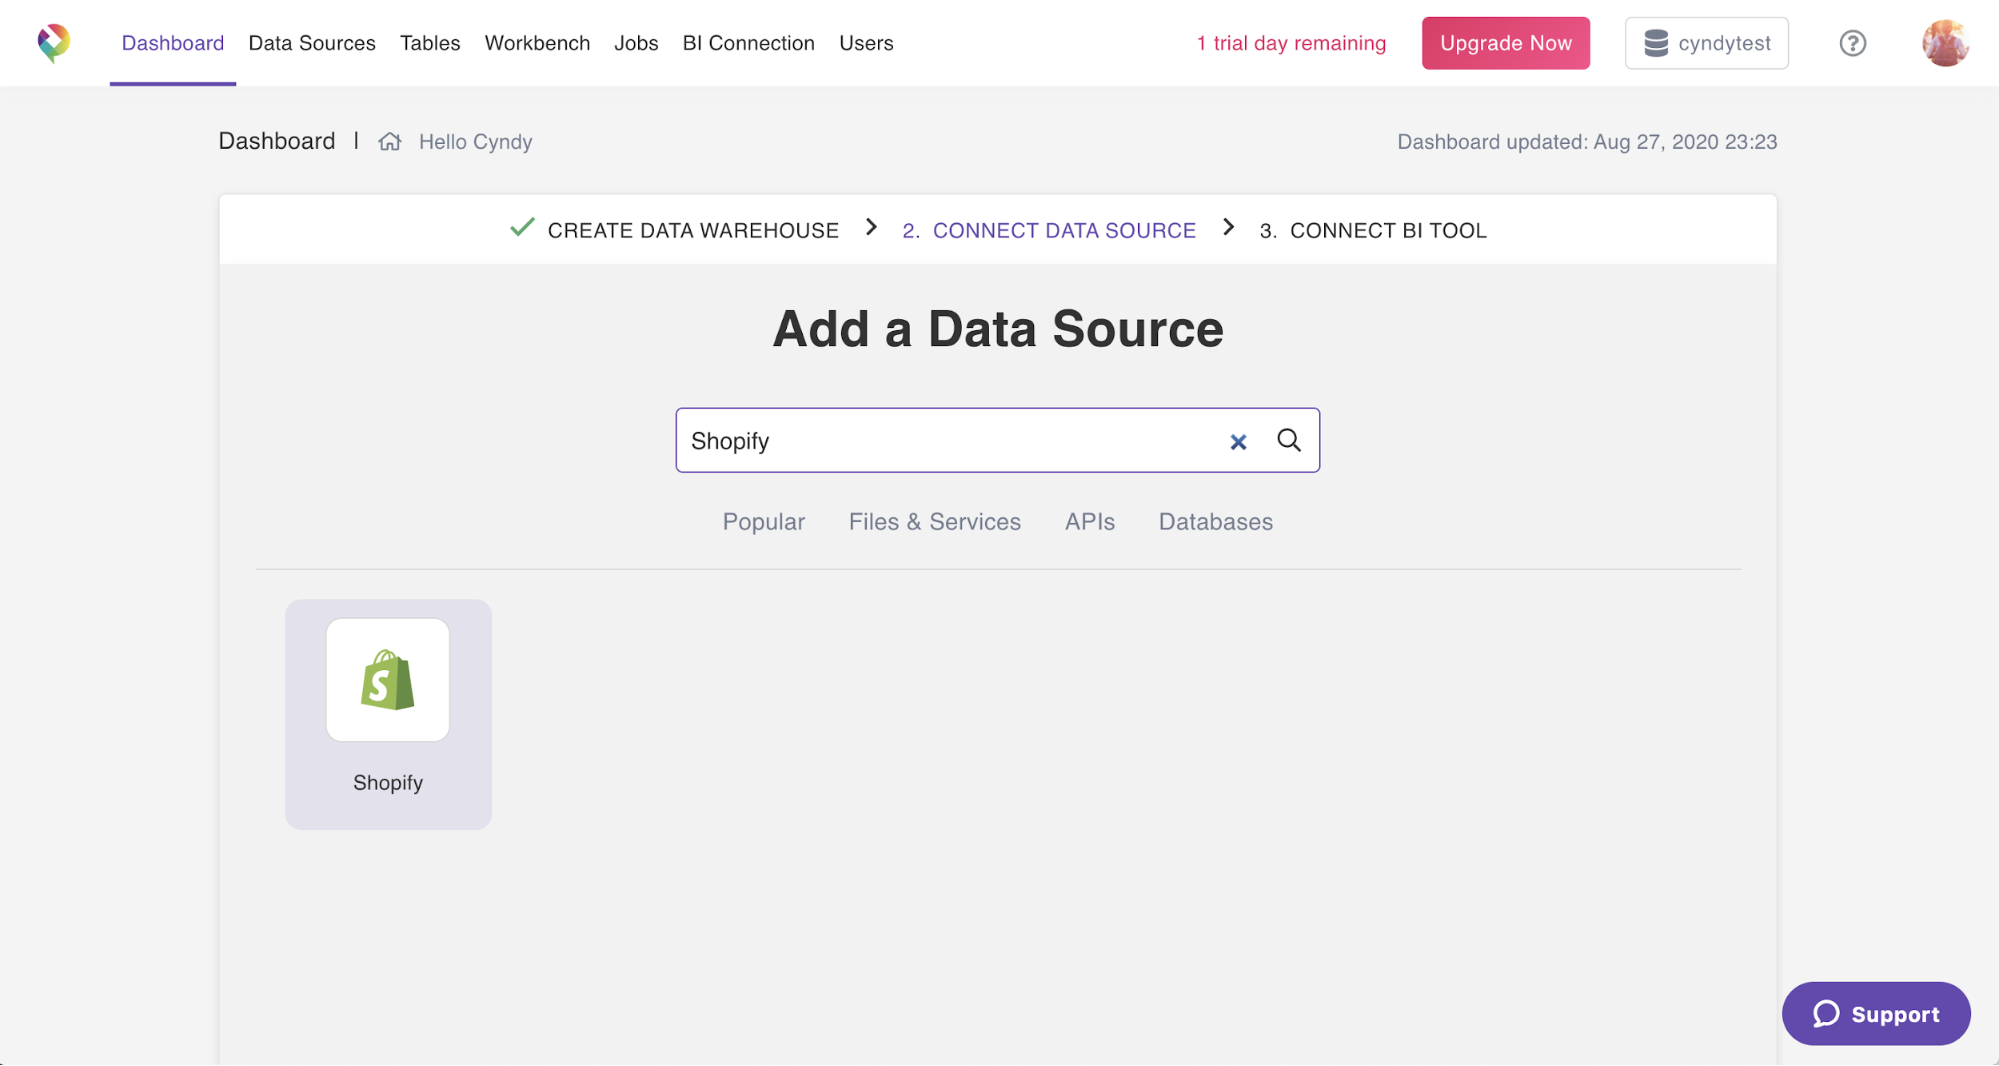
From the Panoply dashboard, search for Shopify or scroll down to browse all data sources. Click the Shopify icon.
Step 2.
Enter your shop name and click Login. In the example below, the shop’s Shopify URL is https://realtrevor.myshopify.com/, so the shop name is “realtrevor”.
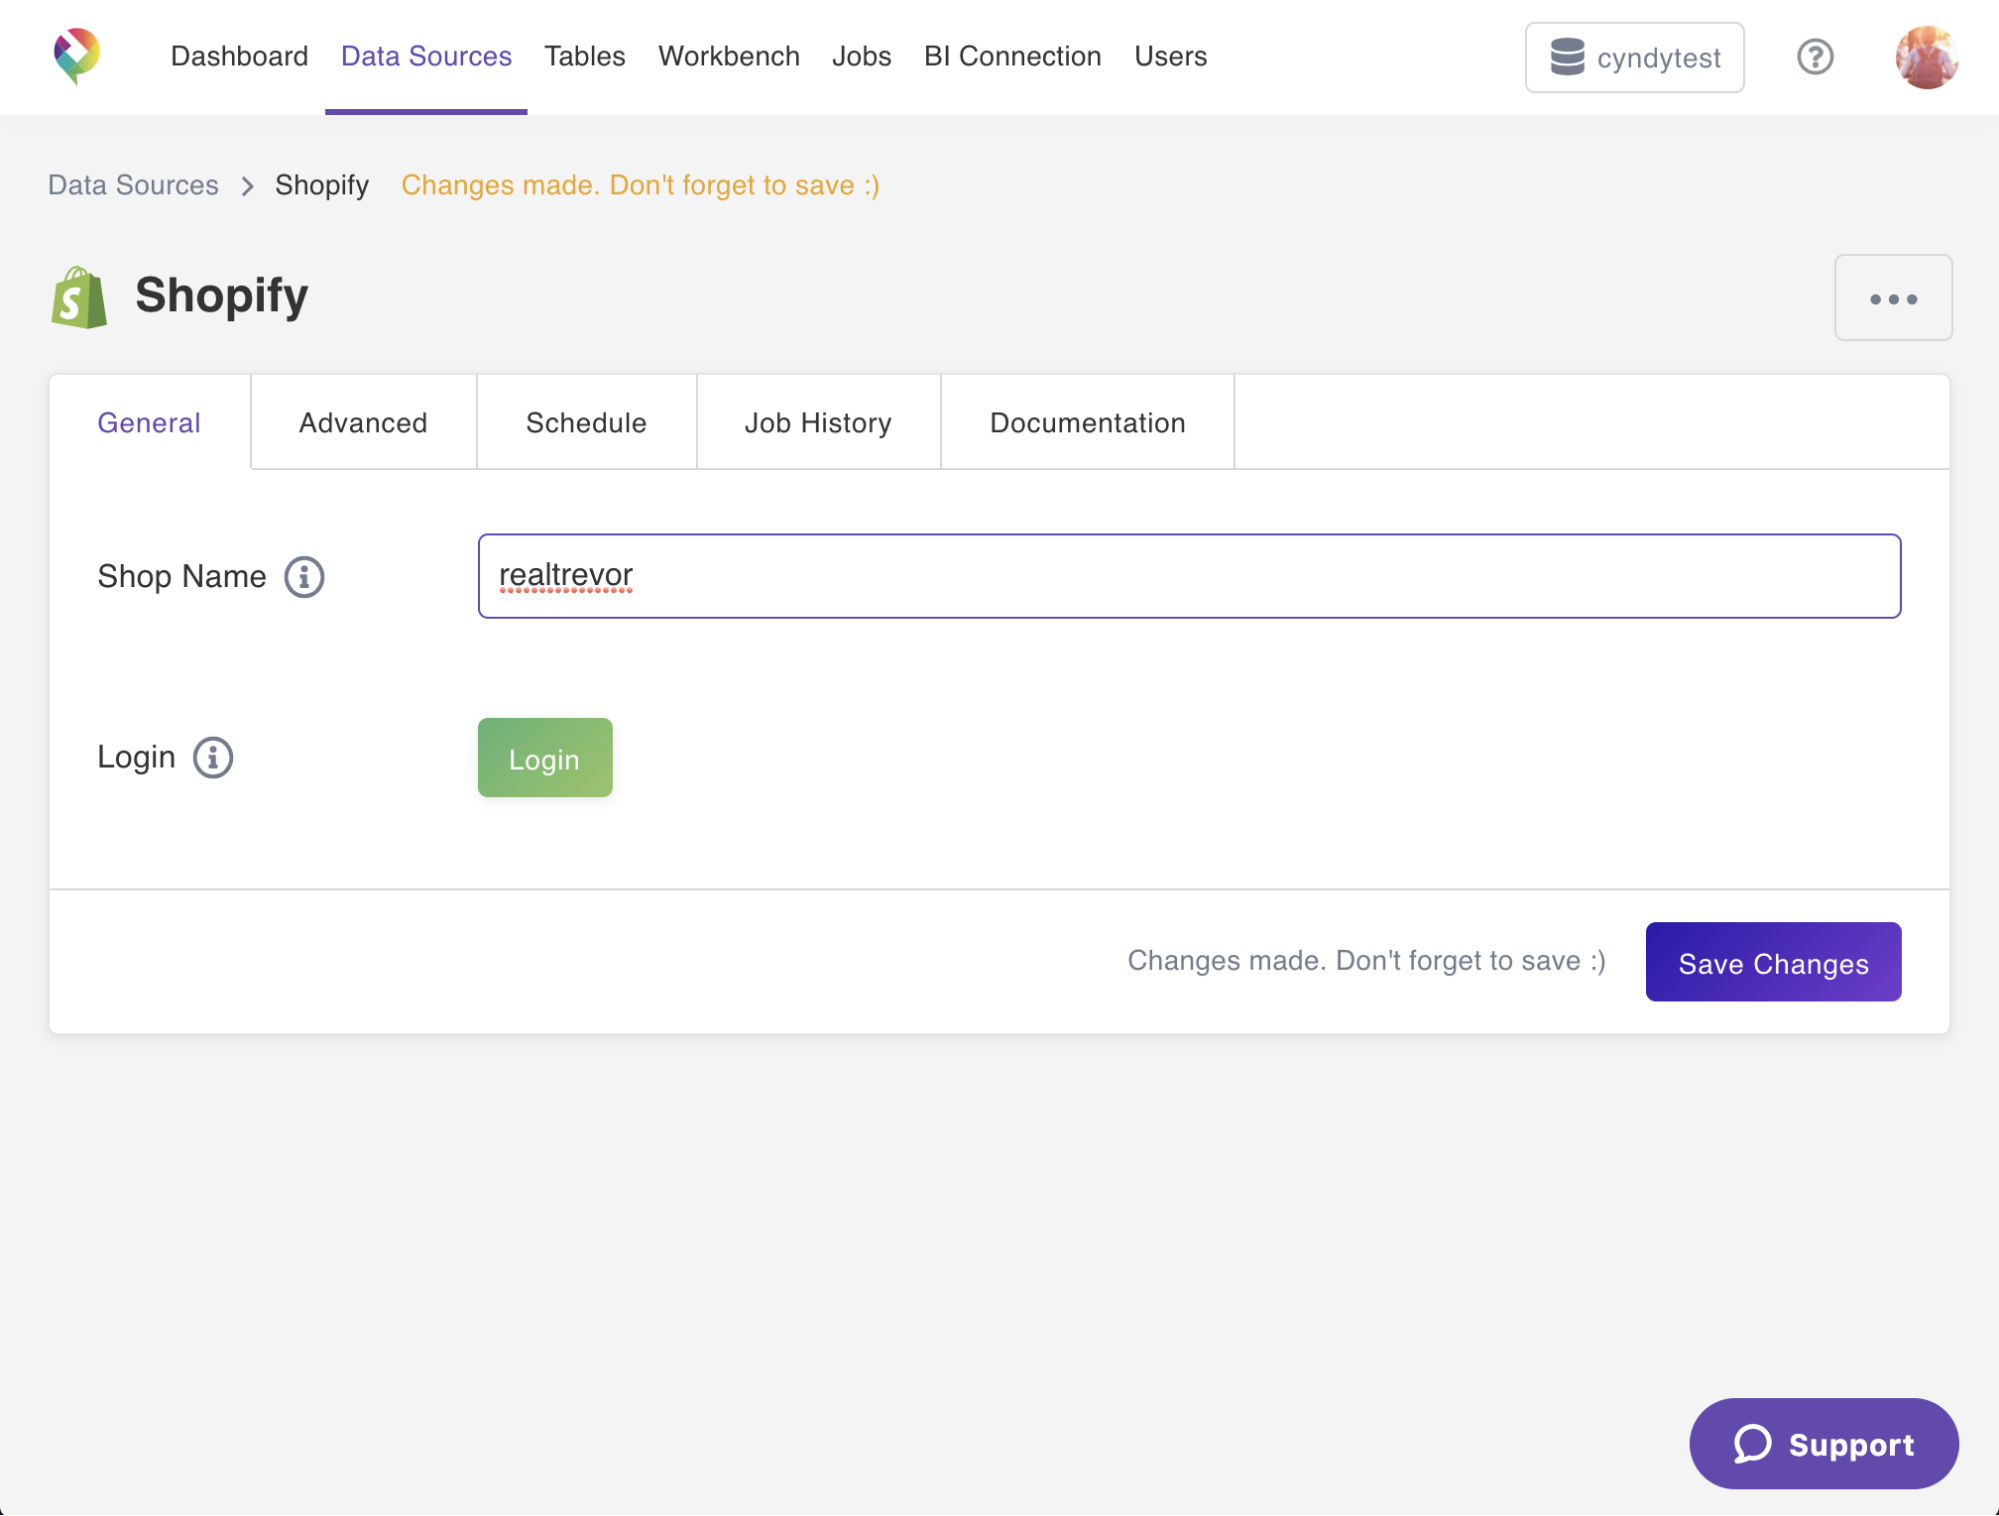
If you’re already logged into Shopify, Panoply will automatically connect to your store. If not, you’ll need to provide your login information.
Step 3.
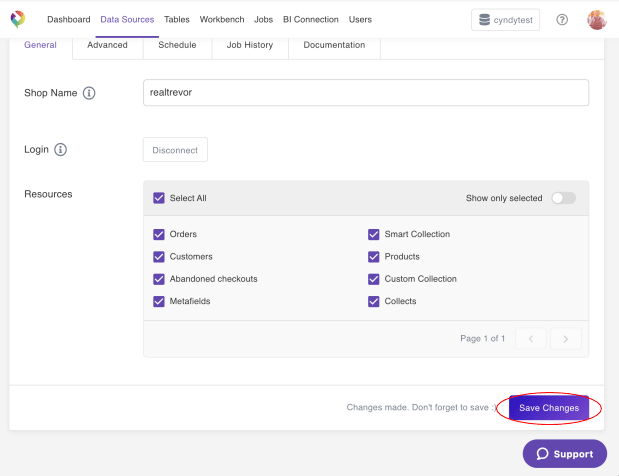
Select the data you want to sync with Panoply. Click Select All or click the checkbox next to the options you want, such as Orders or Customers. Then click Save Changes.
Step 4.
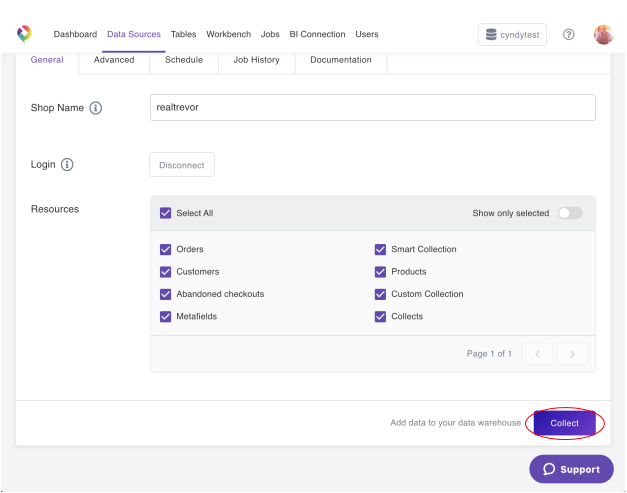
Once you’re happy with your selections, click Collect. Panoply will then begin syncing your Shopify data.
Depending on the size of your store, it will take some time to sync your data. Don’t worry—when your data has successfully synced, you’ll be notified in Panoply and you’ll receive an email notification letting you know it’s ready to query.
Ready to give it a try? Free 21-Day Proof of Value, no credit card required and no strings attached. Once your data’s synced, you can start using this SQL for immediate insights!